Category: HTML CSS
-
Membuat Recent Post dalam Bentuk Grid di Blogspot
Contoh Tampilan Dekstop | Tangkapan Layar – Pada kesempatan kali ini mimin akan memposting bagaimanana cara membuat postingan dalam bentuk grid berdasarkan label di blogger, tutorial ini akan menghasilkan tampilan seperti gambar diatas hanya pada tampilan dekstop.
Gambar diatas menunjukan bagaimana postingan ditampilan berdasarkan label dalam bentuk grid. postingan tersebut berupa recent post yaitu postingan terakhir yang diunggah dari setiap label yang dibuat.Jenis label yang ingin ditampilkan bisa sesuai dengan keinginan kita, jadi sesuai dengan kebutuhan blog masing-masing. Ok, tanpa perlu basa-basi lagi langsung saja kita menuju ke tutorialnya.1. Silahkan login dahulu dashboard blogger anda2. Kemudian masuk ke menu tata letak seperti gambar dibawah ini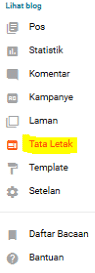 Pilih Tata Letak
3. Setelah masuk ke menu tata letak silahkan lanjutkan dengan memilih tempat dimana wigetnya akan ditaruh, sesuaikan dengan kebutuhan blog anda masing-masing, contohnya seperti gambar dibawah iniAdd Gadget4. Silahkan klik tambahkan gadget/add gadget, ingat ya! ini sesuai dengan kebutuhan anda, jadi pastikan tidak merusak tampilan blog anda. kemudian akan muncul tampilan box atau kotak pop-up seperti dibawah iniPilih HTML/Javascript5. Silahkan isikan kolom judul sesuai dengan label yang akan ditampilkan, dan isi kolom konten dengan kode dibawah ini<style> /* CSS Recent Post Gallery */ .recent-gallery {padding:0;clear:both;} .recent-gallery:after {content:"";display:table;clear:both;} .recent-gallery .gallerytem{display:inline-block;position:relative;margin:6px 0;overflow:hidden;} .recent-gallery .gallerytem a{position:relative;float:left;margin:0 6px;text-decoration:none} .recent-gallery .gallerytem .ptitle{background:rgba(0,0,0,.7);display:block;clear:left;font-size:10px;line-height:1.3em;position:absolute;text-align:left;bottom:3px;left:3px;right:3px;top:3px;color:#fff;padding:5px;word-wrap:break-word;overflow:hidden;visibility:hidden;opacity:0;backface-visibility:hidden;transition:all .2s} .recent-gallery .gallerytem:hover .ptitle{visibility:visible;opacity:1} .recent-gallery a img{background:#fdfdfd;float:left;padding:2px;border:1px solid #e3e3e3;transition:all .3s} .recent-gallery a:hover img {border-color:#bbb;} </style> <script type='text/javascript'> //<![CDATA[ // Recent Post Gallery function arlinagrid(a){for(var t=a.feed.entry||[],e=['<div class="recent-gallery">'],i=0;i<t.length;++i){for(var l=t[i],r=l.title.$t,n=l.media$thumbnail?l.media$thumbnail.url:"http://2.bp.blogspot.com/-4fCf53FqYKM/Vccsy7apoZI/AAAAAAAAK4o/XJkv3RkC0pw/s1600/default%2Bimage.png",s=n.replace("s72-c","s"+arlina_thumbs+"-c"),h=l.link||[],c=0;c<h.length&&"alternate"!=h[c].rel;++c);var d=h[c].href,m='<img src="'+s+'" width="'+arlina_thumbs+'" height="'+arlina_thumbs+'"/>',p=arlina_title?'<span class="ptitle">'+r+"</span>":"",g='<a rel="nofollow" rel="noreferrer"href="'+d+'" target="_blank" title="'+r+'">'+m+p+"</a>";e.push('<div class="gallerytem">',g,"</div>")}e.push("</div>"),document.write(e.join(""))} //]]> </script> <script> var arlina_thumbs = 72; var arlina_title = true; </script> <script src="/feeds/posts/default/-/laborblog.my.id?max-results=8&alt=json-in-script&callback=arlinagrid"></script>
6. Silahkan edit sedikit kode diatas, tulisan yang berwarna biru yang bertuliskan laborblog.my.id. bisa diganti dengan nama label yang ingin ditampilkan, sedangkan angka 8 kuning bisa diganti dengan jumlah postingan yang akan dimunculkan, silahkan sesuaikan dengan kebutuhan teman-teman agar tidak merusak tampilan blog.7. Kemudian silahkan klik simpan/save, selesai.
Sekian postingan mengenai cara membuat recent post perlabel dalam bentuk grid di blogger. terimakasih telah berkunjung, silahkan jangan lupa kunjungi terus laborblog.my.id dan dapatkan informasi dan tutorial menarik setiap hari. -
Create Slideshow HTML CSS Responsive Part 1
Example | Screenshot – Learn how to create a responsive slideshow gallery with CSS and JavaScript. A slideshow is used to cycle through elements:Step 1) Add HTML:<!-- Container for the image gallery --> <div class="container"> <!-- Full-width images with number text --> <div class="mySlides"> <div class="numbertext">1 / 6</div> <img src="img_woods_wide.jpg" style="width:100%"> </div> <div class="mySlides"> <div class="numbertext">2 / 6</div> <img src="img_5terre_wide.jpg" style="width:100%"> </div> <div class="mySlides"> <div class="numbertext">3 / 6</div> <img src="img_mountains_wide.jpg" style="width:100%"> </div> <div class="mySlides"> <div class="numbertext">4 / 6</div> <img src="img_lights_wide.jpg" style="width:100%"> </div> <div class="mySlides"> <div class="numbertext">5 / 6</div> <img src="img_nature_wide.jpg" style="width:100%"> </div> <div class="mySlides"> <div class="numbertext">6 / 6</div> <img src="img_snow_wide.jpg" style="width:100%"> </div> <!-- Next and previous buttons --> <a class="prev" onclick="plusSlides(-1)">❮</a> <a class="next" onclick="plusSlides(1)">❯</a> <!-- Image text --> <div class="caption-container"> <p id="caption"></p> </div> <!-- Thumbnail images --> <div class="row"> <div class="column"> <img class="demo cursor" src="img_woods.jpg" style="width:100%" onclick="currentSlide(1)" alt="The Woods"> </div> <div class="column"> <img class="demo cursor" src="img_5terre.jpg" style="width:100%" onclick="currentSlide(2)" alt="Cinque Terre"> </div> <div class="column"> <img class="demo cursor" src="img_mountains.jpg" style="width:100%" onclick="currentSlide(3)" alt="Mountains and fjords"> </div> <div class="column"> <img class="demo cursor" src="img_lights.jpg" style="width:100%" onclick="currentSlide(4)" alt="Northern Lights"> </div> <div class="column"> <img class="demo cursor" src="img_nature.jpg" style="width:100%" onclick="currentSlide(5)" alt="Nature and sunrise"> </div> <div class="column"> <img class="demo cursor" src="img_snow.jpg" style="width:100%" onclick="currentSlide(6)" alt="Snowy Mountains"> </div> </div> </div>Step 2) Add CSS:Style the image gallery, next and previous buttons, the caption text and the dots:* { box-sizing: border-box; } /* Position the image container (needed to position the left and right arrows) */ .container { position: relative; } /* Hide the images by default */ .mySlides { display: none; } /* Add a pointer when hovering over the thumbnail images */ .cursor { cursor: pointer; } /* Next & previous buttons */ .prev, .next { cursor: pointer; position: absolute; top: 40%; width: auto; padding: 16px; margin-top: -50px; color: white; font-weight: bold; font-size: 20px; border-radius: 0 3px 3px 0; user-select: none; -webkit-user-select: none; } /* Position the "next button" to the right */ .next { right: 0; border-radius: 3px 0 0 3px; } /* On hover, add a black background color with a little bit see-through */ .prev:hover, .next:hover { background-color: rgba(0, 0, 0, 0.8); } /* Number text (1/3 etc) */ .numbertext { color: #f2f2f2; font-size: 12px; padding: 8px 12px; position: absolute; top: 0; } /* Container for image text */ .caption-container { text-align: center; background-color: #222; padding: 2px 16px; color: white; } .row:after { content: ""; display: table; clear: both; } /* Six columns side by side */ .column { float: left; width: 16.66%; } /* Add a transparency effect for thumnbail images */ .demo { opacity: 0.6; } .active, .demo:hover { opacity: 1; }Step 3) Add JavaScript:var slideIndex = 1; showSlides(slideIndex); // Next/previous controls function plusSlides(n) { showSlides(slideIndex += n); } // Thumbnail image controls function currentSlide(n) { showSlides(slideIndex = n); } function showSlides(n) { var i; var slides = document.getElementsByClassName("mySlides"); var dots = document.getElementsByClassName("demo"); var captionText = document.getElementById("caption"); if (n > slides.length) {slideIndex = 1} if (n < 1) {slideIndex = slides.length} for (i = 0; i < slides.length; i++) { slides[i].style.display = "none"; } for (i = 0; i < dots.length; i++) { dots[i].className = dots[i].className.replace(" active", ""); } slides[slideIndex-1].style.display = "block"; dots[slideIndex-1].className += " active"; captionText.innerHTML = dots[slideIndex-1].alt; }Source: w3schools -
How to Copy Text to Clipboard
Screenshot – “Copy to Clipboard” is useful animation for every website related to coding. We think every developer needs to know how it works. Because the developer needs to implement this kind of functionality in the website.We found many articles which provide solution to copy to clip board, but we were not satisfied with them as the codes were lengthy and wrote useless JavaScript. But in the end we have created a “copy to clipboard” animation using just five lines of JavaScript code. Here the overall code is long due to css otherwise the javascript code is very short.So let’s know about this animation how it will work. First you’ll find a textarea, it will also have a copy button. As soon as you click the button, the textarea content will be copied and the button’s “copied” will be written for 3 seconds.If you want to learn animation using javascript and js plugins, We have already created a lot of animation using various plugins of javascript, check out the playlist. We hope you like it.1. HTML Struktur<!DOCTYPE html> <html> <head> <title>Copy To Clipboard JavaScript | laborblog.my.id</title> <link rel="stylesheet" href="style.css"> </head> <body> main content... </body> </html>2. HTML<!DOCTYPE html> <html> <head> <title>Copy To Clipboard JavaScript | laborblog.my.id</title> <link rel="stylesheet" type="text/css" href="style.css"> </head> <body> <div class="container"> <textarea placeholder="Message" cols="30" rows="10" class="copy-text"></textarea> <button class="copy-btn">Copy</button> </div> <script src="script.js"></script> </body> </html>3. CSS{ margin: 0px; padding: 0px; font-family: "Poppins", sans-serif; background: #F7EDE2; display: flex; height: 100vh; justify-content: center; align-items: center; } .container{ background: white; padding: 40px; display: flex; flex-direction: column; justify-content: center; border-radius: 6px; } .copy-text{ border: 2px solid #111; padding: 16px 20px; font-size: 16px; font-weight: 600; height: 350px; width: 800px; margin-bottom: 20px; font-family: inherit; border-radius: 2px; } .copy-btn{ padding: 12px 32px; border: 0px; background: #3F88C5; color: white; width: 120px; font-size: 16px; font-family: inherit; cursor: pointer; font-weight: 600; } .copied{ background: #04AA6D; transition: 0.5s; }4. Javascriptconst btn = document.querySelector(".copy-btn"); const text = document.querySelector(".copy-text"); btn.addEventListener("click", () =>{ text.select(); text.setSelectionRange(0, 10000); document.execCommand("copy"); btn.classList.toggle("copied"); btn.innerHTML = "Copied!"; setTimeout(function(){ btn.classList.toggle("copied"); btn.innerHTML = "Copy"; }, 3000); }); -
Cara Membuat Widget Pricing Plans Untuk Harga Jasa atau Produk
Contoh | Tangkapan Layar – Halo sobat laborblog.my.id, kembali lagi laborblog.my.id akan membagikan tutorial untuk sobat yang menginginkan widget sederhana dan dapat menjelaskan suatu produk atau jasa yang dijual secara lengkap dan ringkas.
Widget tersebut adalah Pricing Plans atau Pricing Area yang biasa kita temukan pada Template Landing Page, berfungsi untuk menampilkan nama produk atau jenis jasa yang lengkap dengan harga, deskripsi dan juga tombol order sekarang. Dengan menggunakan widget ini calon pembeli jasa dan produk akan lebih mudah dalam melihat harga dan juga melakukan kontak.Untuk pemasangan, widget ini cocok untuk dipasang pada halaman depan blog dan juga halaman artikel, tampilan yang modern dan sederhana membuat widget ini mudah untuk dimodifikasi sesuai selera.Info: Tips ini dapat dilakukan pada semua platform.Cara Memasang Widget Pricing Plans di BlogSilahkan sobat masuk ke Blogger > Template > Edit HTMLLetakan kode di bawah ini tepat di atas kode ]]></b:skin>/* Pricing Section by Dunia Blanter */.pricing-section{font-family:’Google Sans’,Arial,sans-serif;position:relative;overflow:hidden;display:block;margin:15px 0;line-height:1.7}.pricing-section .pricing-title{font-size:1.1rem;margin:1rem 0 0;font-weight:700}.pricing-container{display:flex;max-width:1000px;margin:0 auto}.pricing-tag{margin:.5rem 0 1rem;font-size:13px;display:inline-block;background:#333;color:#fff;padding:3px 15px;border-radius:20px}a.blanter-order-btn{font-size:14px;text-transform:uppercase;text-decoration:none;background:#333;color:#fff;display:inline-block;padding:7px 20px;border-radius:20px;transition:all .3s ease-in-out}a.blanter-order-btn:hover{transform:scale(1.1)}.pricing-blanter-column{background:#fff;padding:30px 15px;box-sizing:border-box;border-radius:10px;text-align:center;width:33%;margin:10px;box-shadow:0 7px 7px rgba(0,0,0,0.06);border:2px solid #fff;transition:all .3s ease-in-out}.pricing-blanter-column ul{list-style:none;padding:10px 0;margin:0;font-size:14px;line-height:2.2}.pricing-blanter-column img{width:50px}.pricing-section i{font-size:3rem}.blanter-price{font-weight:700;font-size:22px}.service-info{opacity:.7}.blanter-2-column .pricing-blanter-column{width:50%}.pricing-blanter-column:nth-child(1) .blanter-price,.pricing-blanter-column:nth-child(1) i{color:#f87200} /* Change Color Code */.pricing-blanter-column:nth-child(2) .blanter-price,.pricing-blanter-column:nth-child(2) i{color:#ff5483} /* Change Color Code */.pricing-blanter-column:nth-child(3) .blanter-price,.pricing-blanter-column:nth-child(3) i{color:#2b73f6} /* Change Color Code */.pricing-blanter-column:nth-child(1):hover{border-color:#f87200} /* Change Color Code */.pricing-blanter-column:nth-child(2):hover{border-color:#ff5483} /* Change Color Code */.pricing-blanter-column:nth-child(3):hover{border-color:#2b73f6} /* Change Color Code */.pricing-blanter-column:nth-child(1) .pricing-tag,.pricing-blanter-column:nth-child(1) a.blanter-order-btn{background:#f87200} /* Change Color Code */.pricing-blanter-column:nth-child(2) .pricing-tag,.pricing-blanter-column:nth-child(2) a.blanter-order-btn{background:#ff5483} /* Change Color Code */.pricing-blanter-column:nth-child(3) .pricing-tag,.pricing-blanter-column:nth-child(3) a.blanter-order-btn{background:#2b73f6} /* Change Color Code */
@media screen and (max-width:580px){.pricing-blanter-column,.blanter-2-column .pricing-blanter-column{width:auto}.pricing-container{display:block}}Simpan, atau klik Icon Save.Selanjutnya untuk memasang widget, kode di bawah ini cukup diletakan di tempat yang sobat inginkan, seperti di tata letak blogger, di edit HTML ataupun dapat diletakan pada postingan tertentu (mode HTML seperti pada gambar).Post Mode HTML<div class=”pricing-section”><div class=”pricing-container”><div class=”pricing-blanter-column”><img src=’https://blogger.googleusercontent.com/img/b/R29vZ2xl/AVvXsEi1w8TQ4add1cnsvGdh7VTc8wjYR1y7viZJdSIw47dbn5trkQ6EwbbUXCC7rRuI_cfHfdU1O5sHhIZyMDlOYoJnixEhcSGjSBgOFXud5ngEAE7uJkL2AToluUK6g-K6LL9q-4wOC1eYuJ0/s50/basic.png’ alt=’Basic’/><div class=”pricing-title”>Basic</div><div class=”pricing-tag”>20% off</div><div class=”blanter-price”>Rp 150.000</div><div class=”service-info”><ul><li>Documentation</li><li>Premium Template</li><li>1 License</li><li>Full Optimization</li><li>1 Month Full Support</li><li>Easy Customize</li><li>-</li></ul></div><a class=”blanter-order-btn” href=”#” title=”#” target=”_blank”>Order Sekarang</a></div><div class=”pricing-blanter-column”><img src=’https://blogger.googleusercontent.com/img/b/R29vZ2xl/AVvXsEjAiTGV5wvc6TSeIj8ReinPdvCRHMBV_SG85YZypFaLntGncfw9lDRKEu43kUu2wZzTGd2D1gnVpUcLlf8ItCtoAiHHFYig0iAXMKSl0n8fOcCjjrWCsSJioF-wx-HWdz4hyut6Uyu2OGA/s50/personal.png’ alt=’Personal’/><div class=”pricing-title”>Personal</div><div class=”pricing-tag”>Best Value</div><div class=”blanter-price”>Rp 220.000</div><div class=”service-info”><ul><li>Documentation</li><li>Premium Template</li><li>3 License</li><li>Full Optimization</li><li>3 Month Full Support</li><li>Easy Customize</li><li>-</li></ul></div><a class=”blanter-order-btn” href=”#” title=”#” target=”_blank”>Order Sekarang</a></div><div class=”pricing-blanter-column”><img src=’https://blogger.googleusercontent.com/img/b/R29vZ2xl/AVvXsEgvob-uJynUDM7MNhAsVv1xj6Mnx8SanK6HH9vb9LIOY5Jf-h2rc72arnWTSFh6nakxOUfZ3NswdzVEs36E9ykd0nfytU2efW9IthB_ENRo4jnu5FRCwEATx8O24c2xlIoy0yslWqMqiA8/s50/developer.png’ alt=’Developer’/><div class=”pricing-title”>Developer</div>
<div class=”pricing-tag”>For Business</div><div class=”blanter-price”>Rp 999.000</div><div class=”service-info”><ul><li>Documentation</li><li>Premium Template</li><li>Unlimited License</li><li>Full Optimization</li><li>6 Month Full Support</li><li>Easy Customize</li><li>1 Bonus Template</li></ul></div><a class=”blanter-order-btn” href=”#” title=”#” target=”_blank”>Order Sekarang</a></div></div></div>Simpan.Gambar pada widget ini dapat diganti menjadi Font Awesome dengan merubah kode berikut:<img src=’https://blogger.googleusercontent.com/img/b/R29vZ2xl/AVvXsEi1w8TQ4add1cnsvGdh7VTc8wjYR1y7viZJdSIw47dbn5trkQ6EwbbUXCC7rRuI_cfHfdU1O5sHhIZyMDlOYoJnixEhcSGjSBgOFXud5ngEAE7uJkL2AToluUK6g-K6LL9q-4wOC1eYuJ0/s50/basic.png’ alt=’Basic’/>menjadi kode Font Awesome:<i class=’fas fa-home’></i>
Sekian tips yang bisa laborblog.my.id bagikan kali ini, semoga bermanfaat bagi sobat semua. Jangan lupa untuk Bookmark, Subscribe dan Komentar tentang tutorial ini.[source] -
Demo Widget Pricing Plans
 Basic20% offRp 150.000
- Documentation
- Premium Template
- 1 License
- Full Optimization
- 1 Month Full Support
- Easy Customize
- –
 PersonalBest ValueRp 220.000
- Documentation
- Premium Template
- 3 License
- Full Optimization
- 3 Month Full Support
- Easy Customize
- –
Cara dan Fungsi Penggunaan Tag Textarea Form HTML
IlustrasiObjek form textarea digunakan untuk membuat teks input yang dapat berisi lebih dari satu baris input. Tag textarea mirip dengan tag teks jenis input, tetapi memiliki keuntungan berisi banyak baris. Biasanya, tag textarea digunakan untuk entri yang panjang, seperti komentar, deskripsi, atau catatan.Untuk menggunakan Textarea, kita hanya mengambil label Textarea sebagai berikut:<textarea></textarea>HasilTeks dapat disisipkan di antara tag pembuka dan penutup yang akan ditampilkan sebagai bidang awal text area sebagai berikut:<textarea>Contoh</textarea>HasilMeskipun tidak diperlukan, tetapi jika text area digunakan dalam formulir, atribut name bertindak sebagai identitas tag textarea. Identitas ini diperlukan selama pemrosesan sisi server (misalnya menggunakan PHP). Atribut name ini akan menjadi variabel untuk menyimpan nilai yang dipilih oleh pengguna. Atribut name ditempatkan di dalam tag textarea:<textarea name=”contoh”>contoh</textarea>HasilUntuk membatasi tampilan lebar kolom (cols) dan tinggi baris (rows) dari zona teks. Nilai yang dimasukkan adalah jumlah karakter yang menjadi lebar kotak teks. Misalkan kita mengatur atribut cols = “40”, maka kotak teks akan memiliki lebar karakter 40. Namun, lebar ini tidak akan tepat 40 karakter, karena akan tergantung pada font serta jenis karakter yang diinput.Contoh penggunaan atribut cols dan rows:<textarea cols=”40″>Contoh</textarea><textarea cols=”40″ rows=”10″>Contoh</textarea>HasilAtribut disabled dan readonly digunakan untuk membuat kotak teks tidak dapat digunakan. Penggunaan atribut ini biasanya dipadukan dengan javascript agar bekerja secara maksimal. Misalnya, kotak teks hanya dapat diisi jika pengguna telah mengisi bidang lain. Kedua atribut ini hanya memiliki 1 nilai yaitu dirinya sendiri yang ditulis dengan disabled = “disabled” dan readonly = “readonly”. Berikut adalah contoh penulisannya:<textarea readonly=”readonly”>Contoh</textarea><textarea disabled=”disabled”>Contoh</textarea>HasilMeskipun dua kotak teks yang memiliki atribut ini tidak dapat digunakan, keduanya akan terlihat berbeda. Atribut yang dinonaktifkan akan membuat kotak teks menjadi abu-abu, sedangkan atribut read-only akan terlihat seperti kotak teks biasa. Oleh karena itu, atribut nonaktif biasanya sering digunakan karena akan memberikan kesan kepada pengguna bahwa kotak teks tidak dapat digunakan.
Selain atribut name, value, column, rows, disabled dan read-only, kita juga dapat menggunakan atribut umum seperti id dan class dalam tag textarea. Id dan tag class akan diperlukan untuk pemrograman HTML menggunakan JavaScript dan CSS. Terkadang kotak teks diperlukan untuk memasukkan formulir yang membutuhkan kalimat panjang seperti komentar.CSS Button HTML
CSS Button HTMLButton is one of the html elements that are often found on a website, this element is usually used to submit forms or it could be for other things. Here are some interesting button options:
<!– HTML !–>
<button class=”button-1″ role=”button”>Button 1</button>
<!– CSS !–>
<style>
.button-1 {
background-color: #EA4C89;
border-radius: 8px;
border-style: none;
box-sizing: border-box;
color: #FFFFFF;
cursor: pointer;
display: inline-block;
font-family: “Haas Grot Text R Web”, “Helvetica Neue”, Helvetica, Arial, sans-serif;
font-size: 14px;
font-weight: 500;
height: 40px;
line-height: 20px;
list-style: none;
margin: 0;
outline: none;
padding: 10px 16px;
position: relative;
text-align: center;
text-decoration: none;
transition: color 100ms;
vertical-align: baseline;
user-select: none;
-webkit-user-select: none;
touch-action: manipulation;
}.button-1:hover,
.button-1:focus {
background-color: #F082AC;
}
</style><!– HTML !–>
<button class=”button-2″ role=”button”>Button 2</button>
<!– CSS !–>
<style>
.button-2 {
background-color: rgba(51, 51, 51, 0.05);
border-radius: 8px;
border-width: 0;
color: #333333;
cursor: pointer;
display: inline-block;
font-family: “Haas Grot Text R Web”, “Helvetica Neue”, Helvetica, Arial, sans-serif;
font-size: 14px;
font-weight: 500;
line-height: 20px;
list-style: none;
margin: 0;
padding: 10px 12px;
text-align: center;
transition: all 200ms;
vertical-align: baseline;
white-space: nowrap;
user-select: none;
-webkit-user-select: none;
touch-action: manipulation;
}
</style><!– HTML !–>
<button class=”button-3″ role=”button”>Button 3</button>
<!– CSS !–>
<style>
.button-3 {
appearance: none;
background-color: #2ea44f;
border: 1px solid rgba(27, 31, 35, .15);
border-radius: 6px;
box-shadow: rgba(27, 31, 35, .1) 0 1px 0;
box-sizing: border-box;
color: #fff;
cursor: pointer;
display: inline-block;
font-family: -apple-system,system-ui,”Segoe UI”,Helvetica,Arial,sans-serif,”Apple Color Emoji”,”Segoe UI Emoji”;
font-size: 14px;
font-weight: 600;
line-height: 20px;
padding: 6px 16px;
position: relative;
text-align: center;
text-decoration: none;
user-select: none;
-webkit-user-select: none;
touch-action: manipulation;
vertical-align: middle;
white-space: nowrap;
}.button-3:focus:not(:focus-visible):not(.focus-visible) {
box-shadow: none;
outline: none;
}.button-3:hover {
background-color: #2c974b;
}.button-3:focus {
box-shadow: rgba(46, 164, 79, .4) 0 0 0 3px;
outline: none;
}.button-3:disabled {
background-color: #94d3a2;
border-color: rgba(27, 31, 35, .1);
color: rgba(255, 255, 255, .8);
cursor: default;
}.button-3:active {
background-color: #298e46;
box-shadow: rgba(20, 70, 32, .2) 0 1px 0 inset;
}
</style><!– HTML !–>
<button class=”button-4″ role=”button”>Button 4</button>
<!– CSS !–>
<style>
.button-4 {
appearance: none;
background-color: #FAFBFC;
border: 1px solid rgba(27, 31, 35, 0.15);
border-radius: 6px;
box-shadow: rgba(27, 31, 35, 0.04) 0 1px 0, rgba(255, 255, 255, 0.25) 0 1px 0 inset;
box-sizing: border-box;
color: #24292E;
cursor: pointer;
display: inline-block;
font-family: -apple-system, system-ui, “Segoe UI”, Helvetica, Arial, sans-serif, “Apple Color Emoji”, “Segoe UI Emoji”;
font-size: 14px;
font-weight: 500;
line-height: 20px;
list-style: none;
padding: 6px 16px;
position: relative;
transition: background-color 0.2s cubic-bezier(0.3, 0, 0.5, 1);
user-select: none;
-webkit-user-select: none;
touch-action: manipulation;
vertical-align: middle;
white-space: nowrap;
word-wrap: break-word;
}.button-4:hover {
background-color: #F3F4F6;
text-decoration: none;
transition-duration: 0.1s;
}.button-4:disabled {
background-color: #FAFBFC;
border-color: rgba(27, 31, 35, 0.15);
color: #959DA5;
cursor: default;
}.button-4:active {
background-color: #EDEFF2;
box-shadow: rgba(225, 228, 232, 0.2) 0 1px 0 inset;
transition: none 0s;
}.button-4:focus {
outline: 1px transparent;
}.button-4:before {
display: none;
}.button-4:-webkit-details-marker {
display: none;
}
</style><!– HTML !–>
<button class=”button-5″ role=”button”>Button 5</button>
<style>
/* CSS */
.button-5 {
align-items: center;
background-clip: padding-box;
background-color: #fa6400;
border: 1px solid transparent;
border-radius: .25rem;
box-shadow: rgba(0, 0, 0, 0.02) 0 1px 3px 0;
box-sizing: border-box;
color: #fff;
cursor: pointer;
display: inline-flex;
font-family: system-ui,-apple-system,system-ui,”Helvetica Neue”,Helvetica,Arial,sans-serif;
font-size: 16px;
font-weight: 600;
justify-content: center;
line-height: 1.25;
margin: 0;
min-height: 3rem;
padding: calc(.875rem – 1px) calc(1.5rem – 1px);
position: relative;
text-decoration: none;
transition: all 250ms;
user-select: none;
-webkit-user-select: none;
touch-action: manipulation;
vertical-align: baseline;
width: auto;
}.button-5:hover,
.button-5:focus {
background-color: #fb8332;
box-shadow: rgba(0, 0, 0, 0.1) 0 4px 12px;
}.button-5:hover {
transform: translateY(-1px);
}.button-5:active {
background-color: #c85000;
box-shadow: rgba(0, 0, 0, .06) 0 2px 4px;
transform: translateY(0);
}
</style><!– HTML !–>
<button class=”button-6″ role=”button”>Button 6</button>
<style>
.button-6 {
align-items: center;
background-color: #FFFFFF;
border: 1px solid rgba(0, 0, 0, 0.1);
border-radius: .25rem;
box-shadow: rgba(0, 0, 0, 0.02) 0 1px 3px 0;
box-sizing: border-box;
color: rgba(0, 0, 0, 0.85);
cursor: pointer;
display: inline-flex;
font-family: system-ui,-apple-system,system-ui,”Helvetica Neue”,Helvetica,Arial,sans-serif;
font-size: 16px;
font-weight: 600;
justify-content: center;
line-height: 1.25;
margin: 0;
min-height: 3rem;
padding: calc(.875rem – 1px) calc(1.5rem – 1px);
position: relative;
text-decoration: none;
transition: all 250ms;
user-select: none;
-webkit-user-select: none;
touch-action: manipulation;
vertical-align: baseline;
width: auto;
}.button-6:hover,
.button-6:focus {
border-color: rgba(0, 0, 0, 0.15);
box-shadow: rgba(0, 0, 0, 0.1) 0 4px 12px;
color: rgba(0, 0, 0, 0.65);
}.button-6:hover {
transform: translateY(-1px);
}.button-6:active {
background-color: #F0F0F1;
border-color: rgba(0, 0, 0, 0.15);
box-shadow: rgba(0, 0, 0, 0.06) 0 2px 4px;
color: rgba(0, 0, 0, 0.65);
transform: translateY(0);
}
</style><!– HTML !–>
<button class=”button-7″ role=”button”>Button 7</button>
<style>
.button-7 {
background-color: #0095ff;
border: 1px solid transparent;
border-radius: 3px;
box-shadow: rgba(255, 255, 255, .4) 0 1px 0 0 inset;
box-sizing: border-box;
color: #fff;
cursor: pointer;
display: inline-block;
font-family: -apple-system,system-ui,”Segoe UI”,”Liberation Sans”,sans-serif;
font-size: 13px;
font-weight: 400;
line-height: 1.15385;
margin: 0;
outline: none;
padding: 8px .8em;
position: relative;
text-align: center;
text-decoration: none;
user-select: none;
-webkit-user-select: none;
touch-action: manipulation;
vertical-align: baseline;
white-space: nowrap;
}.button-7:hover,
.button-7:focus {
background-color: #07c;
}.button-7:focus {
box-shadow: 0 0 0 4px rgba(0, 149, 255, .15);
}.button-7:active {
background-color: #0064bd;
box-shadow: none;
}
</style><!– HTML !–>
<button class=”button-8″ role=”button”>Button 8</button>
<!– CSS!–>
<style>
.button-8 {
background-color: #e1ecf4;
border-radius: 3px;
border: 1px solid #7aa7c7;
box-shadow: rgba(255, 255, 255, .7) 0 1px 0 0 inset;
box-sizing: border-box;
color: #39739d;
cursor: pointer;
display: inline-block;
font-family: -apple-system,system-ui,”Segoe UI”,”Liberation Sans”,sans-serif;
font-size: 13px;
font-weight: 400;
line-height: 1.15385;
margin: 0;
outline: none;
padding: 8px .8em;
position: relative;
text-align: center;
text-decoration: none;
user-select: none;
-webkit-user-select: none;
touch-action: manipulation;
vertical-align: baseline;
white-space: nowrap;
}.button-8:hover,
.button-8:focus {
background-color: #b3d3ea;
color: #2c5777;
}.button-8:focus {
box-shadow: 0 0 0 4px rgba(0, 149, 255, .15);
}.button-8:active {
background-color: #a0c7e4;
box-shadow: none;
color: #2c5777;
}
</style><!– HTML !–>
<button class=”button-9″ role=”button”>Button 9</button>
<!– CSS!–>
<style>
.button-9 {
align-items: center;
appearance: none;
background-color: #fff;
border-radius: 24px;
border-style: none;
box-shadow: rgba(0, 0, 0, .2) 0 3px 5px -1px,rgba(0, 0, 0, .14) 0 6px 10px 0,rgba(0, 0, 0, .12) 0 1px 18px 0;
box-sizing: border-box;
color: #3c4043;
cursor: pointer;
display: inline-flex;
fill: currentcolor;
font-family: “Google Sans”,Roboto,Arial,sans-serif;
font-size: 14px;
font-weight: 500;
height: 48px;
justify-content: center;
letter-spacing: .25px;
line-height: normal;
max-width: 100%;
overflow: visible;
padding: 2px 24px;
position: relative;
text-align: center;
text-transform: none;
transition: box-shadow 280ms cubic-bezier(.4, 0, .2, 1),opacity 15ms linear 30ms,transform 270ms cubic-bezier(0, 0, .2, 1) 0ms;
user-select: none;
-webkit-user-select: none;
touch-action: manipulation;
width: auto;
will-change: transform,opacity;
z-index: 0;
}.button-9:hover {
background: #F6F9FE;
color: #174ea6;
}.button-9:active {
box-shadow: 0 4px 4px 0 rgb(60 64 67 / 30%), 0 8px 12px 6px rgb(60 64 67 / 15%);
outline: none;
}.button-9:focus {
outline: none;
border: 2px solid #4285f4;
}.button-9:not(:disabled) {
box-shadow: rgba(60, 64, 67, .3) 0 1px 3px 0, rgba(60, 64, 67, .15) 0 4px 8px 3px;
}.button-9:not(:disabled):hover {
box-shadow: rgba(60, 64, 67, .3) 0 2px 3px 0, rgba(60, 64, 67, .15) 0 6px 10px 4px;
}.button-9:not(:disabled):focus {
box-shadow: rgba(60, 64, 67, .3) 0 1px 3px 0, rgba(60, 64, 67, .15) 0 4px 8px 3px;
}.button-9:not(:disabled):active {
box-shadow: rgba(60, 64, 67, .3) 0 4px 4px 0, rgba(60, 64, 67, .15) 0 8px 12px 6px;
}.button-9:disabled {
box-shadow: rgba(60, 64, 67, .3) 0 1px 3px 0, rgba(60, 64, 67, .15) 0 4px 8px 3px;
}
</style><!– HTML !–>
<button class=”button-10″ role=”button”>Button 10</button>
<!– CSS!–>
<style>
.button-10 {
appearance: button;
background-color: #1899D6;
border: solid transparent;
border-radius: 16px;
border-width: 0 0 4px;
box-sizing: border-box;
color: #FFFFFF;
cursor: pointer;
display: inline-block;
font-family: din-round,sans-serif;
font-size: 15px;
font-weight: 700;
letter-spacing: .8px;
line-height: 20px;
margin: 0;
outline: none;
overflow: visible;
padding: 13px 16px;
text-align: center;
text-transform: uppercase;
touch-action: manipulation;
transform: translateZ(0);
transition: filter .2s;
user-select: none;
-webkit-user-select: none;
vertical-align: middle;
white-space: nowrap;
width: 18%;
}.button-10:after {
background-clip: padding-box;
background-color: #1CB0F6;
border: solid transparent;
border-radius: 16px;
border-width: 0 0 4px;
bottom: -4px;
content: “”;
left: 0;
position: absolute;
right: 0;
top: 0;
z-index: -1;
}.button-10:main,
.button-10:focus {
user-select: auto;
}.button-10:hover:not(:disabled) {
filter: brightness(1.1);
}.button-10:disabled {
cursor: auto;
}
</style><!– HTML !–>
<button class=”button-11″ role=”button”>Button 11</button>
<!– CSS!–>
<style>
.button-11 {
background: #FF4742;
border: 1px solid #FF4742;
border-radius: 6px;
box-shadow: rgba(0, 0, 0, 0.1) 1px 2px 4px;
box-sizing: border-box;
color: #FFFFFF;
cursor: pointer;
display: inline-block;
font-family: nunito,roboto,proxima-nova,”proxima nova”,sans-serif;
font-size: 16px;
font-weight: 800;
line-height: 16px;
min-height: 40px;
outline: 0;
padding: 12px 14px;
text-align: center;
text-rendering: geometricprecision;
text-transform: none;
user-select: none;
-webkit-user-select: none;
touch-action: manipulation;
vertical-align: middle;
}.button-11:hover,
.button-11:active {
background-color: initial;
background-position: 0 0;
color: #FF4742;
}.button-11:active {
opacity: .5;
}
</style><!– HTML !–>
<button class=”button-12″ role=”button”>Button 12</button>
<!– CSS!–>
<style>
.button-12 {
appearance: none;
background-color: #000000;
border: 2px solid #1A1A1A;
border-radius: 15px;
box-sizing: border-box;
color: #FFFFFF;
cursor: pointer;
display: inline-block;
font-family: Roobert,-apple-system,BlinkMacSystemFont,”Segoe UI”,Helvetica,Arial,sans-serif,”Apple Color Emoji”,”Segoe UI Emoji”,”Segoe UI Symbol”;
font-size: 16px;
font-weight: 600;
line-height: normal;
margin: 0;
min-height: 60px;
min-width: 0;
outline: none;
padding: 16px 24px;
text-align: center;
text-decoration: none;
transition: all 300ms cubic-bezier(.23, 1, 0.32, 1);
user-select: none;
-webkit-user-select: none;
touch-action: manipulation;
width: 19%;
will-change: transform;
}.button-12:disabled {
pointer-events: none;
}.button-12:hover {
box-shadow: rgba(0, 0, 0, 0.25) 0 8px 15px;
transform: translateY(-2px);
}.button-12:active {
box-shadow: none;
transform: translateY(0);
}
</style><!– HTML !–>
<button class=”button-13″ role=”button”>Button 13</button>
<!– CSS!–>
<style>
.button-13 {
appearance: none;
background-color: transparent;
border: 2px solid #1A1A1A;
border-radius: 15px;
box-sizing: border-box;
color: #3B3B3B;
cursor: pointer;
display: inline-block;
font-family: Roobert,-apple-system,BlinkMacSystemFont,”Segoe UI”,Helvetica,Arial,sans-serif,”Apple Color Emoji”,”Segoe UI Emoji”,”Segoe UI Symbol”;
font-size: 16px;
font-weight: 600;
line-height: normal;
margin: 0;
min-height: 60px;
min-width: 0;
outline: none;
padding: 16px 24px;
text-align: center;
text-decoration: none;
transition: all 300ms cubic-bezier(.23, 1, 0.32, 1);
user-select: none;
-webkit-user-select: none;
touch-action: manipulation;
width: 19%;
will-change: transform;
}.button-13:disabled {
pointer-events: none;
}.button-13:hover {
color: #fff;
background-color: #1A1A1A;
box-shadow: rgba(0, 0, 0, 0.25) 0 8px 15px;
transform: translateY(-2px);
}.button-13:active {
box-shadow: none;
transform: translateY(0);
}
</style><!– HTML !–>
<button class=”button-14″ role=”button”>Button 14</button>
<!– CSS!–>
<style>
.button-14 {
align-items: center;
appearance: none;
background-image: radial-gradient(100% 100% at 100% 0, #5adaff 0, #5468ff 100%);
border: 0;
border-radius: 6px;
box-shadow: rgba(45, 35, 66, .4) 0 2px 4px,rgba(45, 35, 66, .3) 0 7px 13px -3px,rgba(58, 65, 111, .5) 0 -3px 0 inset;
box-sizing: border-box;
color: #fff;
cursor: pointer;
display: inline-flex;
font-family: “JetBrains Mono”,monospace;
height: 48px;
justify-content: center;
line-height: 1;
list-style: none;
overflow: hidden;
padding-left: 16px;
padding-right: 16px;
position: relative;
text-align: left;
text-decoration: none;
transition: box-shadow .15s,transform .15s;
user-select: none;
-webkit-user-select: none;
touch-action: manipulation;
white-space: nowrap;
will-change: box-shadow,transform;
font-size: 18px;
}.button-14:focus {
box-shadow: #3c4fe0 0 0 0 1.5px inset, rgba(45, 35, 66, .4) 0 2px 4px, rgba(45, 35, 66, .3) 0 7px 13px -3px, #3c4fe0 0 -3px 0 inset;
}.button-14:hover {
box-shadow: rgba(45, 35, 66, .4) 0 4px 8px, rgba(45, 35, 66, .3) 0 7px 13px -3px, #3c4fe0 0 -3px 0 inset;
transform: translateY(-2px);
}.button-14:active {
box-shadow: #3c4fe0 0 3px 7px inset;
transform: translateY(2px);
}
</style><!– HTML !–>
<button class=”button-15″ role=”button”>Button 15</button>
<!– CSS!–>
<style>
.button-15 {
align-items: center;
appearance: none;
background-color: #FCFCFD;
border-radius: 4px;
border-width: 0;
box-shadow: rgba(45, 35, 66, 0.4) 0 2px 4px,rgba(45, 35, 66, 0.3) 0 7px 13px -3px,#D6D6E7 0 -3px 0 inset;
box-sizing: border-box;
color: #36395A;
cursor: pointer;
display: inline-flex;
font-family: “JetBrains Mono”,monospace;
height: 48px;
justify-content: center;
line-height: 1;
list-style: none;
overflow: hidden;
padding-left: 16px;
padding-right: 16px;
position: relative;
text-align: left;
text-decoration: none;
transition: box-shadow .15s,transform .15s;
user-select: none;
-webkit-user-select: none;
touch-action: manipulation;
white-space: nowrap;
will-change: box-shadow,transform;
font-size: 18px;
}.button-15:focus {
box-shadow: #D6D6E7 0 0 0 1.5px inset, rgba(45, 35, 66, 0.4) 0 2px 4px, rgba(45, 35, 66, 0.3) 0 7px 13px -3px, #D6D6E7 0 -3px 0 inset;
}.button-15:hover {
box-shadow: rgba(45, 35, 66, 0.4) 0 4px 8px, rgba(45, 35, 66, 0.3) 0 7px 13px -3px, #D6D6E7 0 -3px 0 inset;
transform: translateY(-2px);
}.button-15:active {
box-shadow: #D6D6E7 0 3px 7px inset;
transform: translateY(2px);
}
</style><!– HTML !–>
<button class=”button-16″ role=”button”>Button 16</button>
<!– CSS!–>
<style>
.button-16 {
background-color: #222;
border-radius: 4px;
border-style: none;
box-sizing: border-box;
color: #fff;
cursor: pointer;
display: inline-block;
font-family: “Farfetch Basis”,”Helvetica Neue”,Arial,sans-serif;
font-size: 16px;
font-weight: 700;
line-height: 1.5;
margin: 0;
max-width: none;
min-height: 44px;
min-width: 10px;
outline: none;
overflow: hidden;
padding: 9px 20px 8px;
position: relative;
text-align: center;
text-transform: none;
user-select: none;
-webkit-user-select: none;
touch-action: manipulation;
width: 19%;
}.button-16:hover,
.button-16:focus {
opacity: .75;
}
</style><!– HTML !–>
<button class=”button-17″ role=”button”>Button 17</button>
<!– CSS!–>
<style>
.button-17 {
background-color: #fff000;
border-radius: 12px;
color: #000;
cursor: pointer;
font-weight: bold;
padding: 10px 15px;
text-align: center;
transition: 200ms;
width: 16%;
box-sizing: border-box;
border: 0;
font-size: 16px;
user-select: none;
-webkit-user-select: none;
touch-action: manipulation;
}.button-17:not(:disabled):hover,
.button-17:not(:disabled):focus {
outline: 0;
background: #f4e603;
box-shadow: 0 0 0 2px rgba(0,0,0,.2), 0 3px 8px 0 rgba(0,0,0,.15);
}.button-17:disabled {
filter: saturate(0.2) opacity(0.5);
cursor: not-allowed;
}
</style><!– HTML !–>
<button class=”button-18″ role=”button”>Button 18</button>
<!– CSS!–>
<style>
.button-18 {
background-color: #c2fbd7;
border-radius: 100px;
box-shadow: rgba(44, 187, 99, .2) 0 -25px 18px -14px inset,rgba(44, 187, 99, .15) 0 1px 2px,rgba(44, 187, 99, .15) 0 2px 4px,rgba(44, 187, 99, .15) 0 4px 8px,rgba(44, 187, 99, .15) 0 8px 16px,rgba(44, 187, 99, .15) 0 16px 32px;
color: green;
cursor: pointer;
display: inline-block;
font-family: CerebriSans-Regular,-apple-system,system-ui,Roboto,sans-serif;
padding: 7px 20px;
text-align: center;
text-decoration: none;
transition: all 250ms;
border: 0;
font-size: 16px;
user-select: none;
-webkit-user-select: none;
touch-action: manipulation;
}.button-18:hover {
box-shadow: rgba(44,187,99,.35) 0 -25px 18px -14px inset,rgba(44,187,99,.25) 0 1px 2px,rgba(44,187,99,.25) 0 2px 4px,rgba(44,187,99,.25) 0 4px 8px,rgba(44,187,99,.25) 0 8px 16px,rgba(44,187,99,.25) 0 16px 32px;
transform: scale(1.05) rotate(-1deg);
}
</style><!– HTML !–>
<button class=”button-19″ role=”button”>Button 19</button>
<!– CSS!–>
<style>
.button-19 {
align-items: center;
background-color: #fff;
border-radius: 12px;
box-shadow: transparent 0 0 0 3px,rgba(18, 18, 18, .1) 0 6px 20px;
box-sizing: border-box;
color: #121212;
cursor: pointer;
display: inline-flex;
flex: 1 1 auto;
font-family: Inter,sans-serif;
font-size: 1.2rem;
font-weight: 700;
justify-content: center;
line-height: 1;
margin: 0;
outline: none;
padding: 1rem 1.2rem;
text-align: center;
text-decoration: none;
transition: box-shadow .2s,-webkit-box-shadow .2s;
white-space: nowrap;
border: 0;
user-select: none;
-webkit-user-select: none;
touch-action: manipulation;
}.button-19:hover {
box-shadow: #121212 0 0 0 3px, transparent 0 0 0 0;
}
</style><!– HTML !–>
<button class=”button-20″ role=”button”>Button 20</button>
<!– CSS!–>
<style>
.button-20 {
background-color: #13aa52;
border: 1px solid #13aa52;
border-radius: 4px;
box-shadow: rgba(0, 0, 0, .1) 0 2px 4px 0;
box-sizing: border-box;
color: #fff;
cursor: pointer;
font-family: “Akzidenz Grotesk BQ Medium”, -apple-system, BlinkMacSystemFont, sans-serif;
font-size: 16px;
font-weight: 400;
outline: none;
outline: 0;
padding: 10px 25px;
text-align: center;
transform: translateY(0);
transition: transform 150ms, box-shadow 150ms;
user-select: none;
-webkit-user-select: none;
touch-action: manipulation;
}.button-20:hover {
box-shadow: rgba(0, 0, 0, .15) 0 3px 9px 0;
transform: translateY(-2px);
}@media (min-width: 768px) {
.button-20 {
padding: 10px 30px;
}
}
</style>
Notes: Get the code by clicking the button will copy the code and paste the code in the column below. Check the code is working or not
Cara Mencegah Copy Paste Artikel Kecuali Kode dan Blockquote
IlustrasiMencegah tindakan copy paste artikel dapat dilakukan dengan mudah dengan plugin atau script tertentu, lalu bagaimana cara mencegah copy paste kecuali tanda kutip atau kode pada artikel tersebut?Tindakan mengcopy paste konten blog orang lain mungkin bukan hal yang aneh lagi Saat ini banyak blogger yang menginginkan kesuksesan instan tanpa kerja keras.
Untuk menghasilkan uang dengan blogging, kita membutuhkan lalu lintas. Traffic dapat dicapai dengan menyajikan konten viral atau berkualitas. Sayangnya, tidak semua blogger yang mengharapkan hasil langsung ingin bersusah payah membuat konten mereka sendiri.“Kalau ada yang mudah kenapa khawatir, toh semua yang ada di internet itu gratis, sudah jadi resikonya”. saya kira, ini adalah kalimat pembelaan dari banyak blogger yang melakukan kecurangan.Bagaimana mencegah copy dan paste posting blog?Ada cara mudah untuk mencegah orang lain menyalin postingan yang kita buat. laborblog.my.id sendiri sudah membuat cara untuk mencegah blogger mengcopy paste konten dengan menambahkan script tertentu. Cukup dengan menambahkan kode berikut di gadget HTML/JAVASCRIPT, pengunjung tidak akan bisa menggunakan shortcut CTRL+A untuk memilih konten artikel.<script src=’demo-to-prevent-copy-paste-on-blogger_files/googleapis.js’></script> <script type=’text/javascript’> if (typeof document.onselectstart!=”undefined” ) { document.onselectstart=new Function (“return false” ); } else { document.onmousedown=new Function (“return false” ); document.onmouseup=new Function (“return true” ); } </script>Selain itu, anda juga dapat menambahkan kode berikut untuk mencegah pencuri mengambil gambar dalam artikel dan menonaktifkan klik kanan menggunakan mouse.<script language=JavaScript>
var message=”©laborblog.my.id 2021″; //Ganti dengan pesan kamu sendiri
function clickIE4() {
if (event.button==2) {
alert (message);
return false;
}
}
function clickNS4(e) {
if (document.layers||document.getElementById&&!document.all) {
if (e.which==2||e.which==3) {
alert(message);
return false;
}
}
}
if (document.layers) {
document.captureEvents(Event.MOUSEDOWN);
document.onmousedown=clickNS4;
} else if (document.all&&!document.getElementById) {
document.onmousedown=clickIE4;
}
document.oncontextmenu=new Function(“alert(message);return false”)
</script>Walaupun judulnya khusus untuk pengguna Blogger, cara ini juga bisa digunakan oleh pengguna WordPress – cukup tambahkan widget CUSTOM HTML di sidebar atau footer Anda, lalu salin kode di atas dan simpan.Bagi Anda yang lebih suka menggunakan plugin, Anda juga dapat mencegah copy paste artikel dengan plugin khusus seperti WP Content Copy Protection with Color Design, WP Content Copy Protection atau WP Content Copy Protection, dan No Right Click. secara otomatis sudah bisa melindungi konten blog Anda.Cara Mencegah Copy Paste Artikel Kecuali Kode dan BlockquoteSatu masalah yang saya temui di kedua metode di atas adalah tidak ada kontrol atas apa yang diblokir – menggunakan skrip atau plugin akan membuat semua item blog tidak dapat disalin, sedangkan jika saya membagikan artikel dengan quote/blockquote atau kode? akan sangat merepotkan pembaca, jika ingin menyalin kode pada artikel tentang tutorial.Di beberapa plugin terdapat fungsi untuk memfilter bagian artikel mana yang bisa dicopy oleh pembaca, namun sayangnya fungsi ini hanya tersedia pada versi premium, untungnya ada cara yang murah!Untuk mencegah agar postingan tidak tercopy paste kecuali kode dan tanda kutip (blockquote), kita bisa menambahkan kode CSS berikut di template Blogger.post-outer {-webkit-touch-callout:none;-webkit-user-select:none;-khtml-user-select:none;-ms-user-select:none;-moz-user-select:none;}.post blockquote,.post pre,.post code{-webkit-touch-callout:text;-webkit-user-select:text;-khtml-user-select:text;-ms-user-select:text;-moz-user-select:text;}Sedangkan untuk pengguna WordPress kamu bisa menggunakan kode berikut:
.entry-content {-webkit-touch-callout:none;-webkit-user-select:none;-khtml-user-select:none;-ms-user-select:none;-moz-user-select:none;}.entry-content blockquote, .entry-content pre, .entry-content code {-webkit-touch-callout:text;-webkit-user-select:text;-khtml-user-select:text;-ms-user-select:text;-moz-user-select:text;}CATATAN: Setiap tema/template memiliki class CSS yang berbeda. Dalam kode di atas menggunakan contoh yang paling umum. Jadi, jika kode ini tidak berfungsi, gunakan fungsi INSPECT browser Anda untuk menentukan class yang benar.Kode Warna HTML dan CSS untuk Pembuatan Blog/Website
Warna Nama Warna HEX RGB .Alice Blue #F0F8FF rgb(240, 248, 254) .Antique White #FAEBD7 rgb(251, 235, 217) .Aqua #00FFFF rgb(0, 255, 254) .Aquamarine #7FFFD4 rgb(115, 255, 216) .Azure #F0FFFF rgb(239, 255, 255) .Beige #F5F5DC rgb(245, 245, 223) .Bisque #FFE4C4 rgb(255, 227, 200) .Black #000000 rgb(0, 0, 0) .Blanched Almond #FFEBCD rgb(255, 234, 208) .Blue #0000FF rgb(0, 0, 255) .Blue Violet #8A2BE2 rgb(138, 43, 226) .Brown #A52A2A rgb(165, 42, 42) .Burly Wood #DEB887 rgb(222, 184, 135) .Cadet Blue #5F9EA0 rgb(95, 158, 160) .Chartreuse #7FFF00 rgb(127, 255, 1) .Chocolate #D2691E rgb(210, 105, 30) .Coral #FF7F50 rgb(251, 127, 80) .Cornflower Blue #6495ED rgb(100, 149, 237) .Cornsilk #FFF8DC rgb(225, 248, 220) .Crimson #DC143C rgb(220, 20, 60) .Cyan #00FFFF rgb(62, 254, 255) .Dark Blue #00008B rgb(0, 0, 139) .Dark Cyan #008B8B rgb(29, 139, 139) .Dark Golden Rod #B8860B rgb(184, 134, 11) .Dark Gray #A9A9A9 rgb(169, 169, 169) .Dark Green #006400 rgb(19, 100, 0) .Dark Khaki #BDB76B rgb(189, 183, 107) .Dark Magenta #8B008B rgb(139, 0, 140) .Dark Olive Green #556B2F rgb(85, 107, 47) .Dark Orange #FF8C00 rgb(251, 140, 1) .Dark Orchid #9932CC rgb(153, 50, 204) .Dark Red #8B0000 rgb(139, 5, 0) .Dark Salmon #E9967A rgb(233, 150, 122) .Dark Sea Green #8FBC8F rgb(143, 188, 144) .Dark Slate Blue #483D8B rgb(72, 61, 139) .Dark Slate Gray #2F4F4F rgb(47, 79, 79) .Dark Turquoise #00CED1 rgb(48, 206, 209) .Dark Violet #9400D3 rgb(148, 0, 211) .Deep Pink #FF1493 rgb(249, 19, 147) .Deep Sky Blue #00BFFF rgb(43, 191, 254) .Dim Gray #696969 rgb(105, 105, 105) .Dodger Blue #1E90FF rgb(30, 144, 255) .Fire Brick #B22222 rgb(178, 34, 33) .Floral White #FFFAF0 rgb(255, 250, 240) .Forest Green #228B22 rgb(34, 139, 35) .Fuchsia #FF00FF rgb(249, 0, 255) .Gainsboro #DCDCDC rgb(220, 220, 220) .Ghost White #F8F8FF rgb(248, 248, 255) .Gold #FFD700 rgb(253, 215, 3) .Golden Rod #DAA520 rgb(218, 165, 32) .Gray #808080 rgb(128, 128, 128) .Green #008000 rgb(27, 128, 1) .Green Yellow #ADFF2F rgb(173, 255, 48) .Honey Dew #F0FFF0 rgb(240, 255, 240) .Hot Pink #FF69B4 rgb(240, 255, 240) .Indian Red #CD5C5C rgb(205, 92, 92) .Indigo #4B0082 rgb(75, 0, 130) .Ivory #FFFFF0 rgb(255, 255, 239) .Khaki #F0E68C rgb(240, 230, 140) .Lavender #E6E6FA rgb(230, 230, 250) .Lavender Blush #FFF0F5 rgb(254, 240, 245) .Lawn Green #7CFC00 rgb(124, 252, 2) .Lemon Chiffon #FFFACD rgb(255, 250, 205) .Light Blue #ADD8E6 rgb(173, 216, 230) .Light Coral #F08080 rgb(240, 128, 128) .Light Cyan #E0FFFF rgb(224, 255, 255) .Light Golden Rod Yellow #FAFAD2 rgb(250, 250, 210) .Light Gray #D3D3D3 rgb(211, 211, 211) .Light Green #90EE90 rgb(144, 238, 144) .Light Pink #FFB6C1 rgb(252, 182, 193) .Light Salmon #FFA07A rgb(251, 160, 122) .Light Sea Green #20B2AA rgb(40, 178, 170) .Light Sky Blue #87CEFA rgb(135, 206, 250) .Light Slate Gray #778899 rgb(119, 136, 153) .Light Steel Blue #B0C4DE rgb(176, 196, 222) .Light Yellow #FFFFE0 rgb(255, 255, 224) .Lime #00FF00 rgb(63, 255, 0) .Lime Green #32CD32 rgb(50, 205, 50) .Linen #FAF0E6 rgb(250, 240, 230) .Magenta #FF00FF rgb(249, 0, 255) .Maroon #800000 rgb(128, 4, 0) .Medium Aqua Marine #66CDAA rgb(102, 205, 170) .Medium Blue #0000CD rgb(0, 0, 205) .Medium Orchid #BA55D3 rgb(186, 85, 211) .Medium Purple #9370DB rgb(147, 112, 219) .Medium Sea Green #3CB371 rgb(60, 179, 113) .Medium Slate Blue #7B68EE rgb(123, 103, 238) .Medium Spring Green #00FA9A rgb(62, 250, 153) .Medium Turquoise #48D1CC rgb(72, 209, 204) .Medium Violet Red #C71585 rgb(199, 21, 133) .Midnight Blue #191970 rgb(25, 25, 112) .Mint Cream #F5FFFA rgb(245, 255, 250) .Misty Rose #FFE4E1 rgb(254, 228, 225) .Moccasin #FFE4B5 rgb(254, 228, 181) .Navajo White #FFDEAD rgb(254, 222, 173) .Navy #000080 rgb(0, 0, 128) .Old Lace #FDF5E6 rgb(253, 245, 230) .Olive #808000 rgb(128, 128, 1) .Olive Drab #6B8E23 rgb(107, 142, 35) .Orange #FFA500 rgb(252, 165, 3) .Orange Red #FF4500 rgb(250, 69, 1) .Orchid #DA70D6 rgb(218, 112, 214) .Pale Golden Rod #EEE8AA rgb(238, 232, 170) .Pale Green #98FB98 rgb(152, 251, 153) .Pale Turquoise #AFEEEE rgb(175, 238, 239) .Pale Violet Red #DB7093 rgb(219, 112, 147) .Papaya Whip #FFEFD5 rgb(254, 239, 213) .Peach Puff #FFDAB9 rgb(253, 218, 185) .Peru #CD853F rgb(205, 133, 63) .Pink #FFC0CB rgb(252, 192, 203) .Plum #DDA0DD rgb(221, 160, 221) .Powder Blue #B0E0E6 rgb(176, 224, 230) .Purple #800080 rgb(128, 0, 128) .Rebecca Purple #663399 rgb(102, 51, 153) .Red #FF0000 rgb(255, 0, 0) .Rosy Brown #BC8F8F rgb(188, 143, 142) .Royal Blue #4169E1 rgb(65, 105, 225) .Saddle Brown #8B4513 rgb(139, 69, 19) .Salmon #FA8072 rgb(250, 128, 114) .Sandy Brown #F4A460 rgb(244, 164, 95) .Sea Green #2E8B57 rgb(46, 139, 87) .Sea Shell #FFF5EE rgb(255, 245, 238) .Sienna #A0522D rgb(160, 82, 45) .Silver #C0C0C0 rgb(192, 192, 192) .Sky Blue #87CEEB rgb(135, 206, 235) .Slate Blue #6A5ACD rgb(106, 90, 205) .Slate Gray #708090 rgb(112, 128, 145) .Snow #FFFAFA rgb(255, 250, 250) .Spring Green #00FF7F rgb(63, 255, 128) .Steel Blue #4682B4 rgb(70, 130, 180) .Tan #D2B48C rgb(210, 180, 140) .Teal #008080 rgb(26, 128, 127) .Thistle #D8BFD8 rgb(216, 191, 216) .Tomato #FF6347 rgb(250, 99, 71) .Turquoise #40E0D0 rgb(64, 224, 208) .Violet #EE82EE rgb(238, 130, 238) .Wheat #F5DEB3 rgb(245, 222, 179) .White #FFFFFF rgb(255, 255, 255) .White Smoke #F5F5F5 rgb(245, 245, 245) .Yellow #FFFF00 rgb(255, 255, 0) .Yellow Green #9ACD32 rgb(154, 205, 49)


